REDCap data entry trigger
Unfortunately, REDCap does not support APIs for selectively downloading updated data. So, if your REDCap server has a limit on how much you can download per a given time, you will need to set up “data entry trigger” (DET).
First step: enabling DET on REDCap web settings
Go to your REDCap project website, then
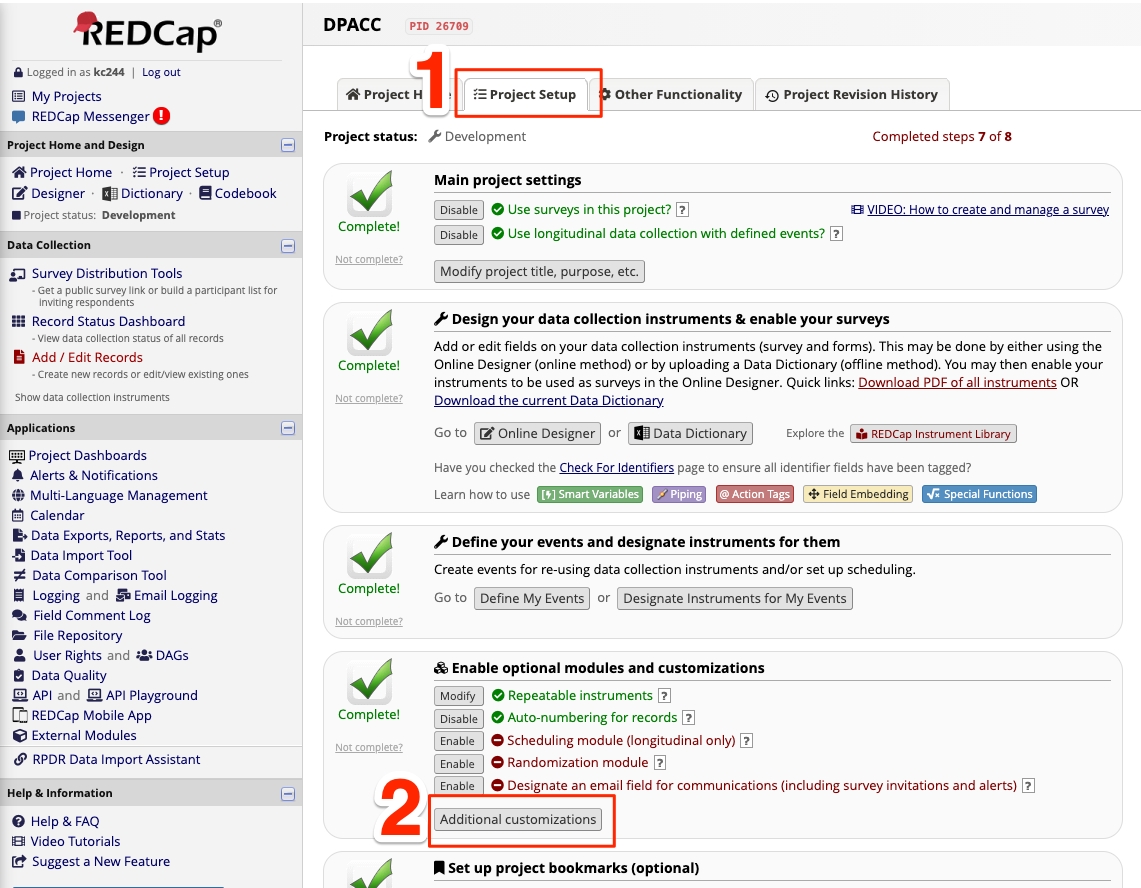
Go to Project Setup
Go to Additional customizations under Enable optional modules and customizations
Go to your REDCap project website, then
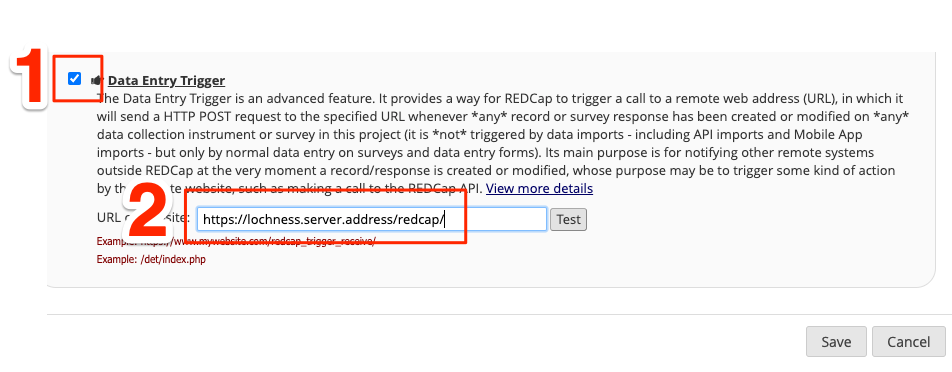
Scroll to the bottom, and enable Data Entry Trigger
Provide an address of your server, where you will be running the lochness. Make sure your firewall is configured to receive signals from the REDCap server. For an example, the REDCap data entry trigger could be configured to send the signal to
https://lochness.server.address/redcap/
Note
Please note the / at the end of the address being entered to the data
entry trigger target.
Second step: set up nginx
The nginx on the server needs be configured to following
(create ssl certificate files and save it under /etc/nginx)
server {
    listen 443 ssl;
    server_name lochness.server.address;
    ssl_protocols TLSv1.2 TLSv1.3;
    ssl_certificate lochness.crt;
    ssl_certificate_key lochness.key;

    location /redcap/ {
        proxy_pass http://localhost:8080/;
    }
}
Note
proxy_pass http://localhost:8080/;
This is directing the signal arriving at https://lochness.server.address/redcap/
to port 8080.
Please note / at the end of /redcap/ and :8080/
Third step: run command to listen to the signal
Run the command below (and keep it running) to listen to any data entry trigger.
listen_to_redcap.py \
    --database_csv /data/pronet/data_sync_pronet/data_entry_trigger_database.csv \
    --port 8080
Note
This command will listen to port 8080 and save database to data_entry_trigger_database.csv file, which will be used by lochness to determine if the REDCap data should be downloaded for the individual or not. (Therefore, you will need to run this command on the server that is running lochness)
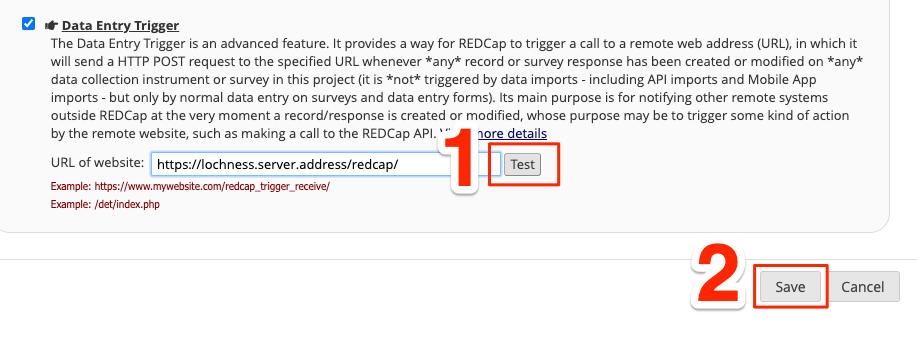
Try pressing “Test” button on the data entry trigger page on the REDCap website, and make sure the console of
listen_to_redcap.pyprinting out some lines whenever you press the “Test button”Save the settings.
Note
Try modifying a data field, and see if your data_entry_trigger_database.csv
saves this change correctly.
Last step: update your configuration file
Your lochness configuration file should include the path of the
data_entry_trigger_database.csv. See example below.
AWS_BUCKET_NAME: pronet-test
AWS_BUCKET_ROOT: TEST_PHOENIX_ROOT_PRONET_PROD
s3_selective_sync: [surveys,mri,phone,eeg,actigraphy]
redcap:
    PronetLA:
        deidentify: True
        data_entry_trigger_csv: /data/pronet/data_sync_pronet/data_entry_trigger_database.csv
        update_metadata: True
    PronetOR:
        deidentify: True
        data_entry_trigger_csv: /data/pronet/data_sync_pronet/data_entry_trigger_database.csv
        update_metadata: True
    ...
If you have more than one REDCap server sending the data entry trigger signal,
nginx and listen_to_redcap.py need to be configured accordingly.